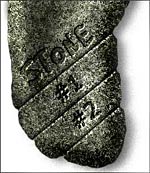
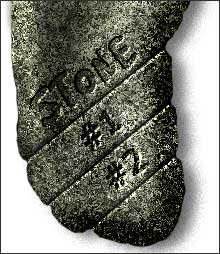
The following tutorial will guide you in creating a fairly realistic stone effect. Although the example in this tutorial is based around applying the effect to an interface, you can use the same technique to create text, or whatever you prefer. The techniques described here are adaptable; you can use these to create a whole variety of different textures and effects - simply change some of the settings and experiment.

5+
Start with a new file, 300x500 pixels and a white background. The first stage of this tutorial will involve creating the stone texture. Make a new layer, choose
Edit » Fill and fill the layer with 50% Gray (located in the
Use dropdown). Go to
Filter » Noise » Add Noise, and for settings enter 18%, Gaussian, and Monochromatic. Run
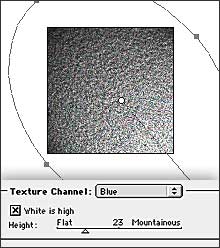
Filter » Render » Lighting Effects and set the Texture Channel as in the example below (you can use any of the RGB channels for this, it doesn't have to be blue). The rest of the settings don't matter much - this is just to create a "natural" base which we are going to destroy in the next step! Click OK.
2. Next go to
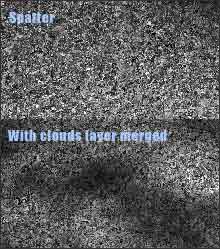
Filter » Brush Strokes » Spatter and press OK (use default settings: Radius 10, Smoothness 5). Make a new layer and fill it with 50% Gray again. Reset your colors by pressing D, then run
Filter » Render » Clouds. Now apply
Image » Adjustments » Auto Levels to the clouds. Change this layer's mode from Normal to Multiply, set the opacity to 75%, and merge it with the stone layer below (control E). This will have created a kind of random variation over the surface. Because there are a lot of random factors introduced with running some of the "gallery effects" filters you may want to run them again a few times or tweak them to suit you.
3. Now apply
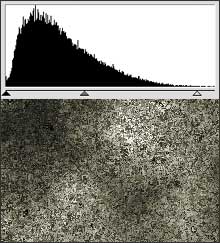
Levels (CTRL+L), and enter the settings indicated in the example below - the main adjustment here is in the midtones. Adjust the
Hue/saturation (CTRL+U) using the colorize checkbox and use these settings: hue 70, saturation 10, and brightness 0. You should be left with something similar to the example below.
After that, go to
Layer » Layer Style » Bevel and Emboss. For the settings, choose Inner Bevel, Smooth, Depth 421%, Size 27, Soften 12. Use Color Dodge (opacity 63) as the highlight mode and Color Burn (opacity 44, or higher if you like) for the shadow. If you're using version 5 you can still create a similar effect.
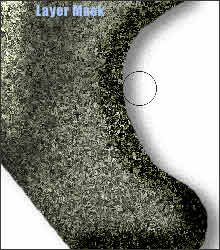
4. Now we're going to carve our stone into some kind of shape. Take your chisel... er, actually you don't need a chisel. What you do need is a layer mask. To add one to the "stone layer" choose
Layer » Add Layer Mask » Hide All (or hold ALT and click on the Add Layer Mask icon in the Layers palette). This will completely mask the layer, but don't worry - your stone texture is only hidden, not deleted.
Choose the
Paintbrush tool with a hard edged brush at 100% opacity, and draw white onto the layer mask. Make sure the MASK is highlighted in the Layers palette while you do this (the little box on the right side of the layer in the Layers palette). You can create any shape you want in this way! Switch from white to black using the X key to paint your shape and easily correct/refine any of your brushstrokes. This is the power of layer masks - your shape will always be editable.
Go to
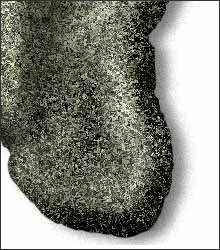
Layer » Layer Style » Drop Shadow to give the stone layer a drop shadow... opacity 50, distance 13, spread 0, size 13 and noise 10%.
5. Next create a new layer
underneath the stone layer, which will provide a solid black base. Load the stone shape as a selection (by control clicking the layer mask on the layer in the Layers palette) and fill the selection on the new layer with black.
Now go back to the stone layer. Paint into the layer mask again, this time with black using a soft edged
10% opacity brush. This will make some soft indentations in the stone and should help make the bevel look less artificial.
6. For the last step you will be creating some ridges - these can be used for interface buttons or whatever you want.
Create a new layer on the top and use the
Line Tool to make some black lines going across the surface (set the weight to 2 pixels). Now add another
Layer » Layer Style » Bevel and Emboss (Outer Bevel, Smooth, Depth 100, Direction: Down, Size 5, Soften 0). Use Color Dodge again for the highlights and Multiply for the shadows. You might want to adjust the direction of the light slightly here - just uncheck the "Use Global Light" box and fiddle with the direction pointer.
Now go to the layers palette and
ALT/Option click the narrow line between the stone layer and the line layer. This creates a
Clipping Group which will restrict your bevelled lines to the contours of your stone shape. You can add some text at this point if you'd like. Remember to try tweaking various settings throughout the stages of this tutorial to get other interesting effects.


